Sekiro’s Posture System Explained: Deflects, Posture Damage and Deathblows
How Sekiro's posture bar works: deflect vs block, posture recovery, perilous attacks like thrusts, sweeps and grabs, and how deathblows end fights.
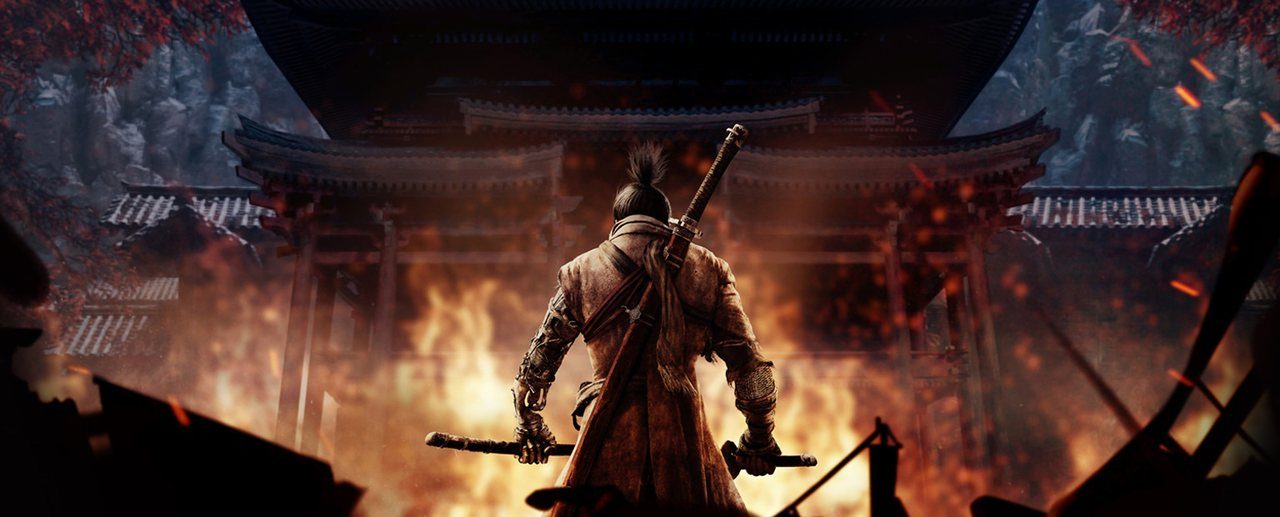
Sekiro: Shadows Die Twice, released by FromSoftware in March 2019, looks like a souls-like at first glance. Then you try to fight a samurai the way you would fight a knight in Dark Souls, circling, waiting and chipping away at health, and it goes badly. Sekiro’s combat is built around a second bar, posture, and almost every fight is won by breaking it rather than by draining health. Understanding how posture works is the difference between a frustrating game and one of the most satisfying combat systems of its generation. This guide covers the system from the ground up, purely from the combat angle.
Two Bars: Vitality and Posture
Every character in Sekiro, including the player, has two resources:
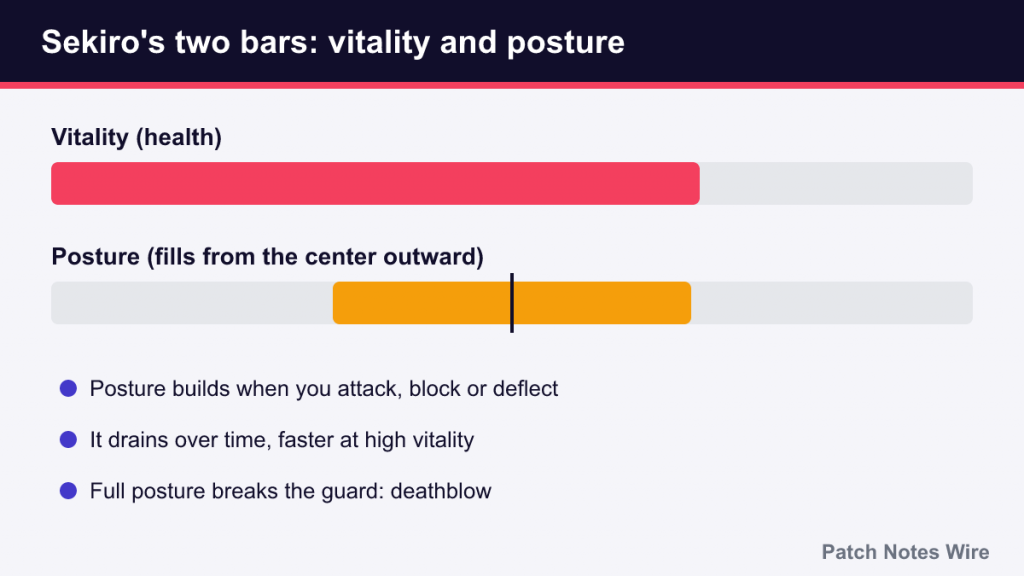
- Vitality is health. When it runs out, you die (or an enemy becomes vulnerable to a finishing blow).
- Posture is balance and composure. It is shown as a horizontal bar that fills from the center outward as a character takes pressure. When it fills completely, the character’s guard breaks.
The crucial idea is that these two bars interact. Posture builds up when you attack, block or deflect, and it drains back down over time. But how quickly it drains depends on vitality. A character at full health recovers posture quickly; a character with low health recovers it much more slowly. So damaging an enemy’s health is not wasted even if you are aiming for a posture break: it makes their posture stick.
Breaking Posture and the Deathblow
When an enemy’s posture bar fills completely, they stagger and a red dot appears on them. That is your window for a deathblow, a finishing strike that kills ordinary enemies outright regardless of how much vitality they have left. You can also land a deathblow by depleting an enemy’s vitality completely.
Bosses and mini-bosses have multiple deathblow marks, shown as dots under their health bar. Each deathblow removes one mark, and the fight continues into a new phase until the final mark is gone. This is why a boss “dies” and then stands up again; you have only removed one of its lives.
A staggered enemy will not stay vulnerable forever. If you fail to land the deathblow within a few seconds, the enemy recovers a portion of its posture and the fight continues. Always be ready to commit when the posture bar breaks.
There is also the Shinobi Deathblow, a stealth kill on an unaware enemy, or a plunging attack from above. Against bosses with multiple marks, a stealth deathblow at the start can remove one mark before the fight properly begins, which is a common way to make some fights shorter.
Deflect vs Block
Sekiro has one defensive button, used in two very different ways.
Blocking (guarding)
Holding the guard button blocks most normal attacks. Your vitality is protected, but your posture still takes damage, and some attacks (thrusts, for example) are not reduced by guarding at all. If you block too much, your posture fills and your guard breaks, leaving you staggered and open to heavy damage.
Deflecting
Pressing guard just before an attack lands produces a deflect, marked by a bright spark and a sharp metallic sound. A deflect has several advantages over a block:
- It deals posture damage to the attacker.
- It builds much less posture on you than blocking.
- It opens the enemy for a counterattack.
- Even if your own posture bar is full, a successful deflect will not break your guard.
That last point is important. Against a long combo, deflecting every hit is safer than blocking, even if your posture bar is nearly full.
Don’t mash guard
The timing window for a deflect is generous on a single press but shrinks if you press guard repeatedly. Mashing reduces your chances of getting a clean deflect. The better approach is to learn an enemy’s rhythm and press once per incoming hit. If you want the broader context of how parry systems are designed across games, see our explainer on parry systems from Street Fighter III to Sekiro.
How Posture Recovers
Your own posture starts to drain back to zero after a brief pause with no posture damage. It will not recover while you are attacking, sprinting, using the grappling hook or staggered. A few rules govern the rate:
- Holding guard speeds recovery significantly, as long as you are not being hit.
- Low vitality slows recovery. According to the Sekiro community wiki, posture recovers at full rate above 75% vitality, at around two-thirds rate between 50% and 75%, at around one-third rate between 25% and 50%, and almost not at all below 25%. The posture bar flashes when low health is limiting regeneration.
Enemies follow the same logic: their posture recovers when you are not pressuring them, and recovers more slowly the more damage they have taken. That leads to the two main ways of winning a fight.
Strategy 1: posture pressure
Stay aggressive, attack constantly, and deflect the enemy’s attacks. The constant pressure keeps their posture from recovering until it breaks. This is how many fights against skilled human opponents are won.
Strategy 2: vitality first
Against enemies whose posture recovers quickly or is hard to fill, deal vitality damage first. As their health falls, their posture recovery slows, and eventually a few deflects are enough to break it. Large enemies and many beasts are easier to fight this way.
In practice, most fights mix both: you attack to deal vitality damage and keep posture high, deflect when the enemy attacks, and attack again when they pause.
Perilous Attacks
Some attacks cannot be blocked. When an enemy uses one, a red kanji character meaning “danger” flashes over your character. There are three main types, and each has a specific answer.
| Perilous attack | What it looks like | Best response |
|---|---|---|
| Thrust | A forward stab with a sword or spear | Mikiri Counter, or deflect |
| Sweep | A low swing at the legs | Jump; land on the enemy for posture damage |
| Grab | A lunge to seize you | Step-dodge sideways or jump |
Thrusts and the Mikiri Counter
The Mikiri Counter is a skill: dodge forward into a thrust and Sekiro steps onto the enemy’s weapon, dealing heavy posture damage. Thrusts can also be deflected with good timing. The Mikiri Counter is generally the stronger response, but it requires recognizing the thrust animation, not just the warning kanji.
Sweeps and jump kicks
Jumping over a sweep avoids it, and if you press jump again over the enemy, Sekiro kicks off their head, dealing significant posture damage. Dodging back also works but loses the opportunity.
Grabs
Grabs cannot be deflected. Dodge sideways or jump away, ideally at the last moment so you are in position to counter.
The common mistake
The kanji is the same for all three types. The most common error, especially early on, is reacting to the warning with the wrong defense, such as jumping into a thrust. Watch the enemy’s body, not just the warning: a low stance usually means a sweep, a lunge forward with an outstretched hand usually means a grab, and a pulled-back weapon usually means a thrust. Many experienced players make it a habit to react a moment later than the warning, after identifying the attack.
Lightning Reversal and Other Exceptions
Some late-game enemies use lightning attacks. If you are struck while in the air, you can press attack before landing to redirect the lightning at the enemy, a technique called Lightning Reversal. If you are hit on the ground, you take heavy damage and are stunned. Lightning reversal is one of the clearest examples of Sekiro’s design philosophy: an attack that seems overwhelming is turned into an opening if you respond correctly.
Prosthetic Tools
Sekiro’s prosthetic arm can be fitted with shinobi tools that support the posture system. Some enemies have specific weaknesses: animals are often frightened by the Shinobi Firecracker, shields can be broken with the Loaded Axe, and the Loaded Umbrella can protect against many attacks. Using the right tool can open a stagger or create an opening for posture damage, but the core of every fight remains deflecting and attacking.
Your Own Posture Break
When your posture fills completely, Sekiro staggers and cannot defend for a short time, and attacks during that window can do significantly more damage. Pressing dodge or jump during the stagger shortens it and performs a recovery move with some invincibility, which can save you from a follow-up. Our explainer on invincibility frames covers why moves like this protect you briefly. The best answer, of course, is to avoid the break by deflecting instead of blocking and by backing off to recover when your bar is high.
Putting It All Together
A typical Sekiro duel goes like this:
- Open with a few attacks to test the enemy’s guard and deal some damage.
- When the enemy attacks, deflect each hit rather than blocking.
- Watch for the danger kanji, identify the perilous attack and respond correctly.
- When the enemy pauses after a combo, attack again to keep posture high.
- When your own posture is high, step back and hold guard to recover.
- When the enemy’s posture breaks, land the deathblow immediately.
The shift that makes Sekiro click for most players is accepting that it rewards aggression and confidence. Retreating and waiting for openings, a common approach in other FromSoftware games, gives enemies time to recover posture. Staying close, attacking and deflecting is what wins fights. Once that rhythm takes hold, the game transforms from a wall into a duel. Sekiro was named Game of the Year at The Game Awards 2019, and its posture system is a big part of why its combat is still discussed today.